Photography Basics for Beginner Photographers


Composition of a photograph is basically deciding where to place your subject in it and what goes around the subject. While there are no rules to be creative, there are some guidelines to make some better looking photographs. The creativity comes from the artist not with the gears or tools he is using
Even
if you have the most expensive camera anyone can buy, your photograph will look
like a snapshot if you don’t know how to compose it. Alternatively, if you are
good at composing the photographs you took with a cheap smartphone will look
stunning. In this tutorial, I will be showing you some composition techniques you
can use to improve your photography skills.
As
the name suggests you have to fill the whole frame with your subject. This is
the simplest technique of composition as we don’t need to worry about the
position of different elements except for the subject. All the distractions can be
avoided using this technique and you only have to worry about one thing i.e.
the subject.
Now
you may wonder, where to use it? Well, you could use this in many genres of photography like wildlife photography, portrait photography, food photography,
etc. you can manage to achieve the details which cannot be seen in a normal
photograph like the texture of the skin or a wound on a lions face.

Image source- Google | image by - EMN Photography
Rule
of thirds is the most used composition technique. Just imagine the photo be
divided into 3 parts horizontally as well as vertically. You will get grid-like lines formed on the image. Now what we have to do is place the subject on
either one the points where those lines intersect with each other or place it on
one of the vertical lines.
 | |
|
When
we place the subject as mentioned above, the viewer’s eye automatically goes to
the subject.
| Image source- Google | image by - Adele Humphries |
Centered
Composition is exactly the opposite of the rule of third, here you keep your
subject in the dead center which makes it the most important element in the frame
as there are no distractions.
 |
Image Source – Google | image by - AndrésNieto Porras |

Image Source – Google | image by - Jim Zuckerman
Leading
lines a photograph are some sort of lines or curves or pattern which lead the
viewer’s eye to the subject. You could use roads or stairs or the texture on
the wall or floor to lead it to your subject.

Image Source – Google | image by - Ron Kroetz.
It
is not all necessary the lines should lead us to the center of the frame, they
can go in any direction line the Photograph we can see above. Here the lines
are leading us to the right/left side of the images and the subject is placed
in the path of those lines.
Patterns and texture can be regular and repetitive or also can be irregular and varied but all of them are pleasing to the eyes. You can use them as a subject and also as leading lines to guide the viewer to the subject.

Image Source – Google | image by - Visual Design
In
the image above the patterns are regular and repetitive and they are
complimenting the whole scene

Image Source – Google | image by - graemeocalog
Unlike
the first image here the patterns are irregular but still are pleasing and
satisfying to the eyes.

Image Source – Google | image by - SLR lounge
Frame
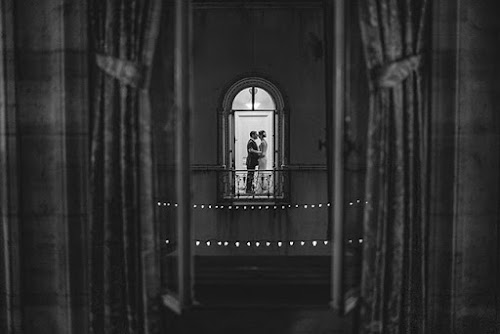
within the Frame is a composition technique where a sense of depth can be seen in
the Photograph. You can use a door, branches of a tree, or stairs to create a
frame-like structure in the foreground.

Image Source – Google | image by - digital photography school
Using
some sort of diagonal line which goes from one corner to the other corner of
the frame makes the image look great and you can also use it connect two
dissimilar type of color or emotion in a photograph.

Image Source – Google | image by - 1001 best photography tips
‘Golden
Triangle’ is a little similar to the ‘Rule of Thirds’, here the frame is
divided by a diagonal line coming from one corner and going to the opposite corner
and two more diagonal lines are drawn from the other two corners and are joined to
the longer diagonal at the right angle.

Image Source – Google | image by - brent mail photography
Like
‘Rule of Thirds’ the position of the subject is determined according to the
lines or their intersection points.

Image Source – Google | image by - photographyhero
Negative
space is basically an empty space in your photograph. Some say that leaving an
empty space would make your Photograph look incomplete, but sometimes negative
space is your friend and using negative space gives a feeling of freedom and
the Photograph looks satisfying.

Image Source – Google | image by - Nicholas goodden photography
Playing
with colors is very important as a Photographer as it helps us to understand
which color matches which. You should practice using a color wheel because in a
color wheel opposite colors makes a great combination with each other.
Above given are some of the basic composition techniques and for sure there is more to this topic but here are some you should start your photography with.
I
like to see your work and would love to see if this article helped so if it did
please share your photos on Instagram and tag @infinit_o_graphy
Comments
Post a Comment